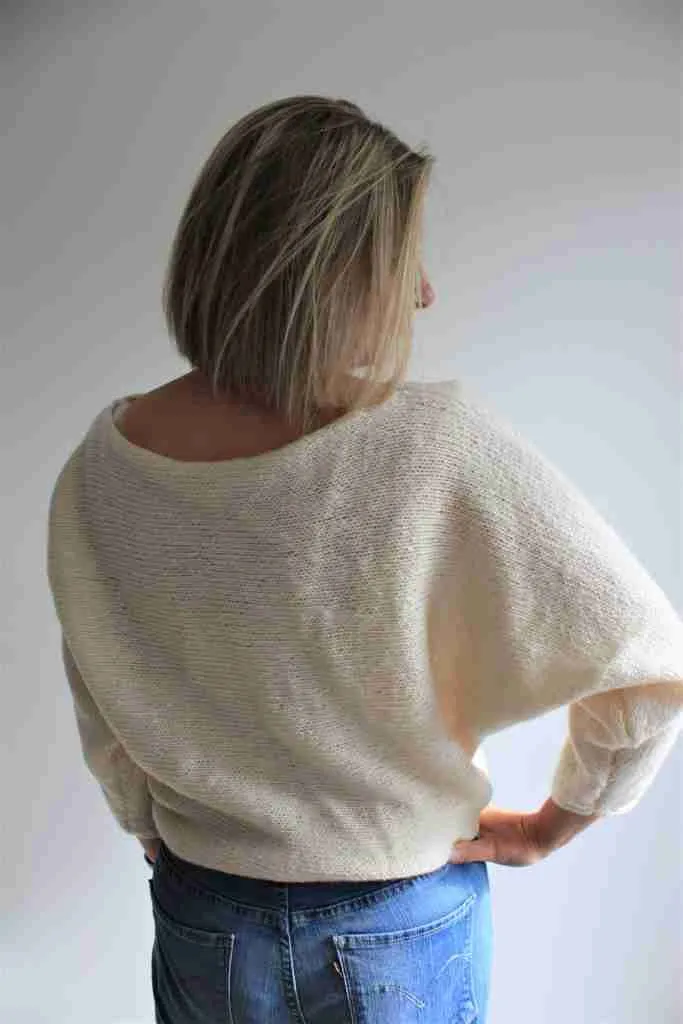
Not only is this batwing sleeve jumper knitting pattern super easy to create but it’s super easy (and super stylish) to wear.
An added bonus is that it’s boat neck and oversized shape means it skims over all those lumps and bumps that we like to hide!
Why Should I Knit a Batwing Sleeve Jumper?
Batwing or dolman style jumpers are narrow at the wrist and wide at the armhole, They’re a great style for beginners as they have little shaping so they’re easy to knit and there will only be a couple of simple seams once you’re done with your knitting (and guess what? They’re nice and straight!)
The best bit is that because of the oversize shaping between the shoulder and the waist, there’s more chance that you’ll create a jumper that fits you if you’re new to knitting garments.
PSST….. if you’re just learning how to knit, you might like to check out my Knitting Knowledge page.
(I’d recommend bookmarking it so you can pop back later if you want to check out some knitting jargon!)

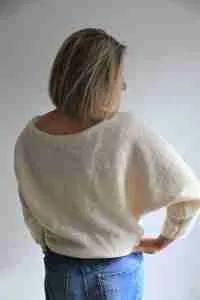
Want to save this for later? Pin it on Pinterest here:
If you like this post you may want to follow me for more ideas in your pinterest feed:
Are you on Ribblr yet? You should be!
Save all of your projects as epatterns that you can access on the go via your phone. You can even bookmark where you’ve worked to for next time!
See my patterns on Ribblr here
If you prefer an ad free version of this pattern you can purchase it here:
What Size Should I Make?
XS chest 28 inch/actual size 35 inches/ length 18 inches or 46cm
S chest 34 inch/actual size 37 inches/length 18 inches or 46cm
M chest 38 inch/actual size 41 inches/length 18 inches or 46cm
L chest 42 inch/ actual size 45 inches/length 18 inches or 46cm
XL chest 46 inch/actual size 50 inches/length 18 inches or 46cm
2XL chest 50 inch/actual size 55 inches/length 18 inches or 46cm
3XL chest 54 inches/actual size 57 inches/length 18 inches or 46cm
4XL chest 58 inches/actual size 59 inches/length 18 inches or 46cm
5XL chest 62 inches/actual size 64 inches/length 18 inches or 46cm
What Do I Need To Knit A Batwing Sleeve Jumper?
To knit your batwing jumper you will need:
- DK Yarn any material will work so you can try a cool cotton version for the Summer or go warm and woolly in the Winter. I used Schachenmayr Wool4Future
- Size XS/S Approx 1050m
- Size M Approx 1050m
- Size L/XL/2XL Approx 1400m
- Size 3XL/4XL/5XL Approx 1750m
- 4mm knitting needles. I used a circular needle by Addi which I love for speed then you can find them here via Amazon or Lovecrafts (affiliate link), but if you prefer something with a bit of grip so you don’t drop stitches then bamboo needles are the way to go – these are some of my favourites which you can find on Amazon or Lovecrafts
- Tapestry needle
- Scissors
- Measuring Tape
If you’re looking for ideas or new tools then check out some of my favourite in my Amazon shop. (They won’t cost you any more but I may make a small commission if you buy anything)
Do I Need A Gauge Swatch For My Batwing Sweater?
Gauge is important to give you an idea of whether your project will be the size you want, especially important with clothing! Can you imagine putting in all that work to find you can’t get your arm in or it’s hanging off your shoulders?
Ok maybe that’s the look you want, especially with this project, but so many crafters miss this stage out and then spend just as long pulling out their work to remake it so it fits. Moral of the story is check it’s going to fit first!!
I usually recommend making a swatch that measures at least 10 x 10 cm / 4 x 4 inches using the stitch in the pattern the gauge is given for (see below).
Test your yarn and needles against the gauge sizing below or see your yarn information label to check the typical gauge if you want to use an alternative.
Stockinette Stitch = 22 stitches x 30 rows (10×10 cm)
If your swatch is smaller than this then swap to a larger set of needles, if you have a larger swatch then use a smaller needle until the required gauge is reached.
How To Knit Your Batwing Jumper
Abbreviations
CO – Cast On
K – Knit stitch
P – Purl Stitch
St st – Stockinette Stitch (Row 1 knit all stitches, Row 2 Purl all stitches)
BO – Bind Off
Things You Should Know
- The pieces are worked sideways, starting at one wrist and increasing the number of stitches to create the batwing shape. We will then be working across the body and finally decreasing the number of stitches for the second sleeve.
- If you would like a wider, slouchier body then add extra rows once the first sleeve is complete.
- All measurements given are unblocked.
- Note that measurements are given as exact as possible. Your tension & technique might give variations in the result, but that’s what makes it unique!
- If you are unsure of the stitches I have video tutorials on YouTube
Main Body (Make 2)
CO 23 (23,23,25,25,25,27,27,27) stitches for the wrist
Row 1 Knit all stitches
Row 2 Purl all stitches
Row 3 Knit all stitches
Row 4 CO 2 stitches to start increasing the width of the sleeve, P to the end of the row (this will remain straight and is the neck edge)
Repeat these 4 rows until there are 55 (55,55,61,61,67,67,67,73) stitches (you should end on a purl row)
Next row: Knit all stitches
Next row: CO 2 stitches, P to the end of the row
Repeat the last 2 rows until there are 91 stitches (this should be a purl row)
Next row: Knit all stitches
Next row: CO 9 stitches.
This is the end of your sleeve increases and now we’re going to work sideways across the waist/hips.
Knit The Waist
Mark the beginning of this row to help you measure the required width.
Continue working in Stockinette st without further shaping until your waist straight edge measures 17 (18,20,22,24,26,27,28,31) inches, end on a knit row.
(If you would like a wider, slouchier look to your sweater you can add more rows here.)
Shaping Your Second Sleeve
BO 9 stitches, Purl to the end of the row (you should have 91st)
Next row K all stitches
Next Row BO 2 stitches, P to the end of the row
Repeat last 2 rows until 55 (55,55,61,61,67,67,67,73) stitches remain (this should be a Purl row)
Next row K all stitches
Next row P all stitches
Next row K all stitches
Next row BO 2 stitches, P to the end of the row
Repeat the last 4 rows until 23 (23,23,25,25,25,27,27,27) stitches remain on your needle for the wrist.
BO all stitches.
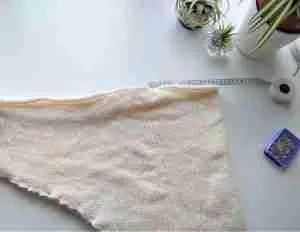
Putting It All Together
Place your pieces right sides together on a flat surface with the straight edge of the shoulders facing each other.
To create your neck opening measure the width of your longest straight edge and mark the centre with a pin. Measure 5 (6, 6, 7) inches to each side of this marker and pin. Remove the centre pin.
(You can make your neckline slouchier and create an off the shoulder style by making this opening wider.)
Sew your shoulder seams from the pins to the outside edge.
Sew the side seams from the wrist to the waist. Weave in any ends, turn your work the right way out and get out there to show it off
I’ve knitted this on conventional needles – my sister loved it! Thank you!
I want to knit this for myself now…how can I do this on circular needles please?
Hi Kate, it is knitted in the same way on circular needles, you would work each piece flat then seam them together.