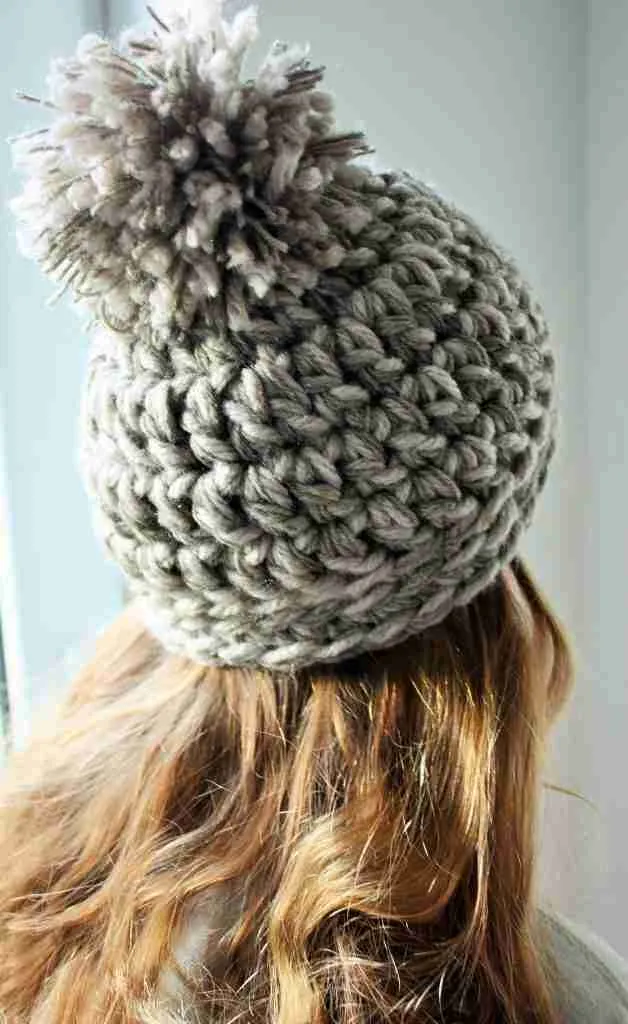
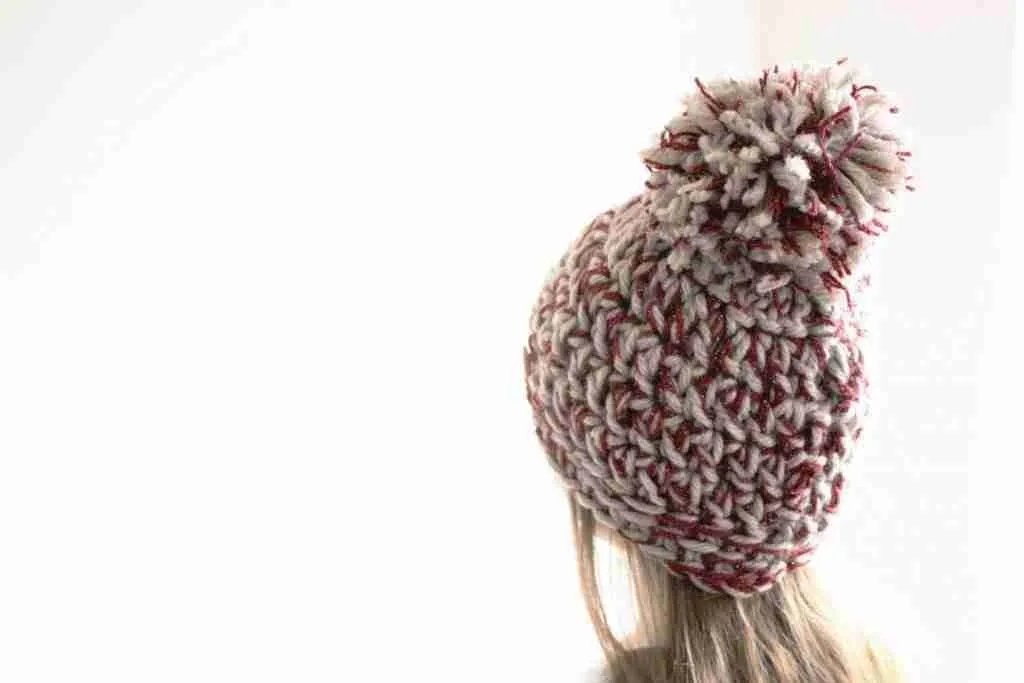
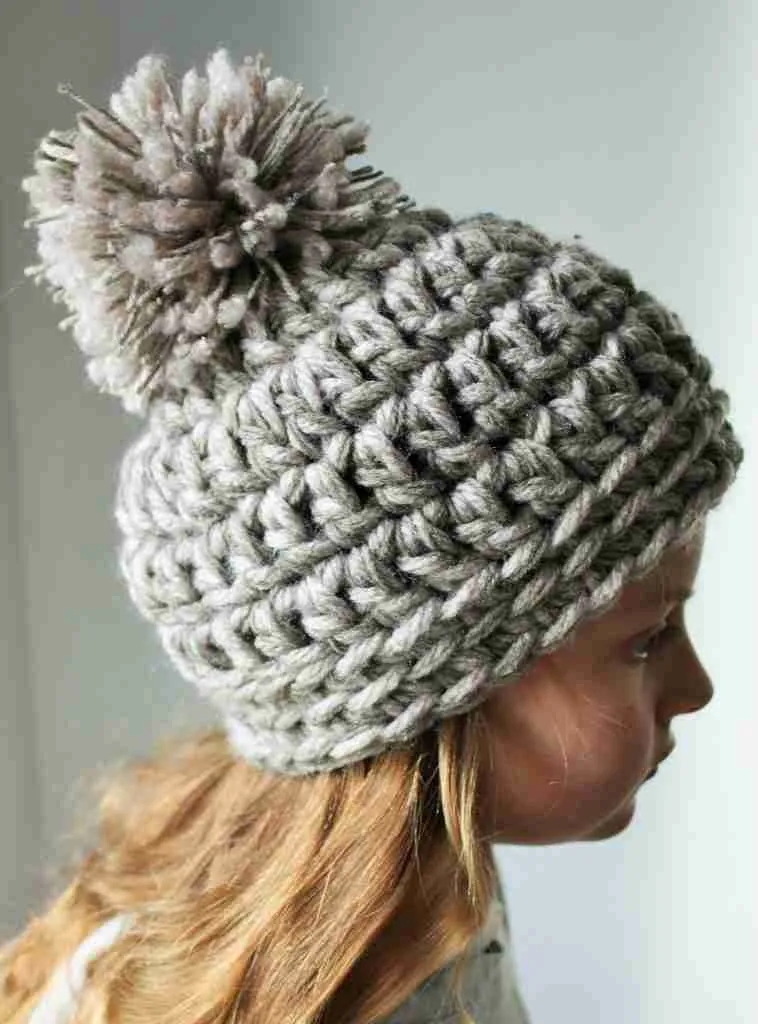
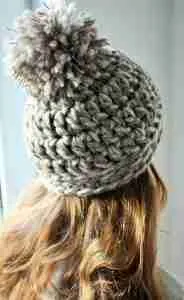
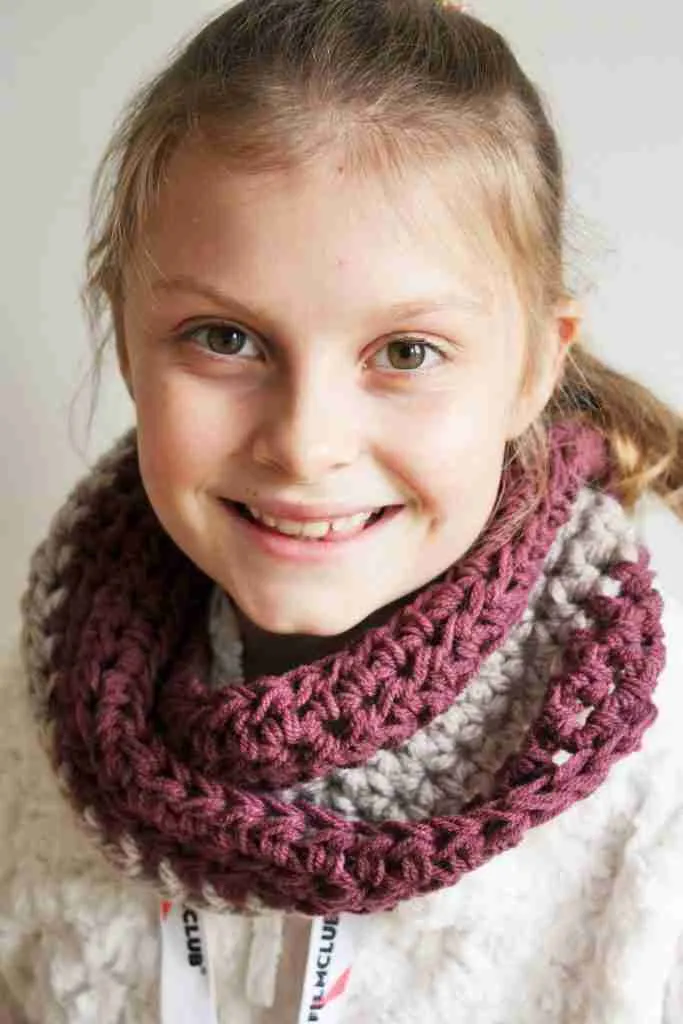
This super chunky crochet hat will keep you warm all winter long. It’s made using only basic stitches so you won’t need any fancy skills to complete this project.
Are you a new crocheter looking for a quick and easy to crochet beanie hat tutorial to practice your double crochet stitching?
Maybe you’re a more experienced crocheter who wants a quick palate cleansing project to use up some chunky yarn from your stash?
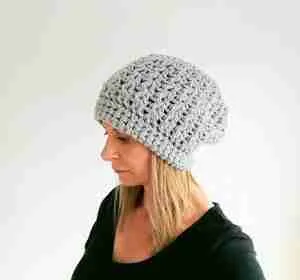
This free easy to crochet chunky beanie hat is perfect whether you’re a beginner or a pro.
It has been a best seller in my pattern shop for the last couple of years so I thought it was about time I shared it with you.

This super easy pattern works up in under 2 hours so it’s perfect for last minute gifts or for when you need to keep your hands busy during a netflix session!
Even if these stitches are new to you, don’t worry as I have YOUTUBE TUTORIALS to help you learn, or you can develop your crochet skills further on the Crochet College page

Before You Start Your Super Chunky Crochet Hat
Want to take your project with you? Buy The ad free printable PDF pattern from the shop here
Short on time at the moment?
Add this pattern to your Ravelry Queue here or your Ribblr queue here
Want to share it with your friends? Pin it for later here
What is My Head Size And How Do I Measure It?
It is always good practice to measure the circumference of the person’s head you want to make the hat or beanie for because they may differ from the standard sizes and it’s pretty important that it’s not falling over their eyes.
You’ll need a soft tape measure and the person to measure, so you can get the circumference at the widest part of their head.
For example, if you are wanting to make a men’s crochet hat you would crochet your hat to a circumference of 22 to 24 inches with a 9 or 9.5 inch height (see below), but measuring that person’s head will give you an exact measurement.
The same thing goes with any size of crochet hat you want to make in the future, even if the pattern has different sizing – you just need to know how many stitches there are per inch!
Don’t worry if it just isn’t possible to measure (cos you don’t want to give away the surprise if it’s a gift, right?)
Then you can go by the standard sizes listed below when creating your hat.
Standard Hat Sizing For Crochet Hats
Usually hat sizes are around:
Child 18-20 inches with 8 inch height
Tween 20-22 inches with 8 inch height
Women 21-23 inches with 8.5-9 inch height
Men 22-24 inches with 9-9.5 inch height
It’s a good idea to make your hat about 1-2 inches smaller than these diameters so it has a nice snug fit!
The stitch count for this pattern creates a hat that is around 22 inches so it was designed to fit everyone from teenagers through to adults
What About Gauge?
Gauge is important to give you an idea of whether your project will be the size you want, especially important with clothing. We don’t want that hat blowing away as you sashay down the street!
I usually recommend making a swatch that measures at least 10 x 10 cm / 4 x 4 inches using the stitch in the pattern the gauge is given for (see below).
Test your yarn against the gauge sizing below or check your yarn information label to check the typical gauge if you want to use an alternative.
Double Crochet (US terms) 6DC and 3 rows = 4 x 4 inches (10x10cm).
If your swatch is smaller than this then swap to a larger hook, if you have a larger swatch then use a smaller size hook until the required gauge is reached.
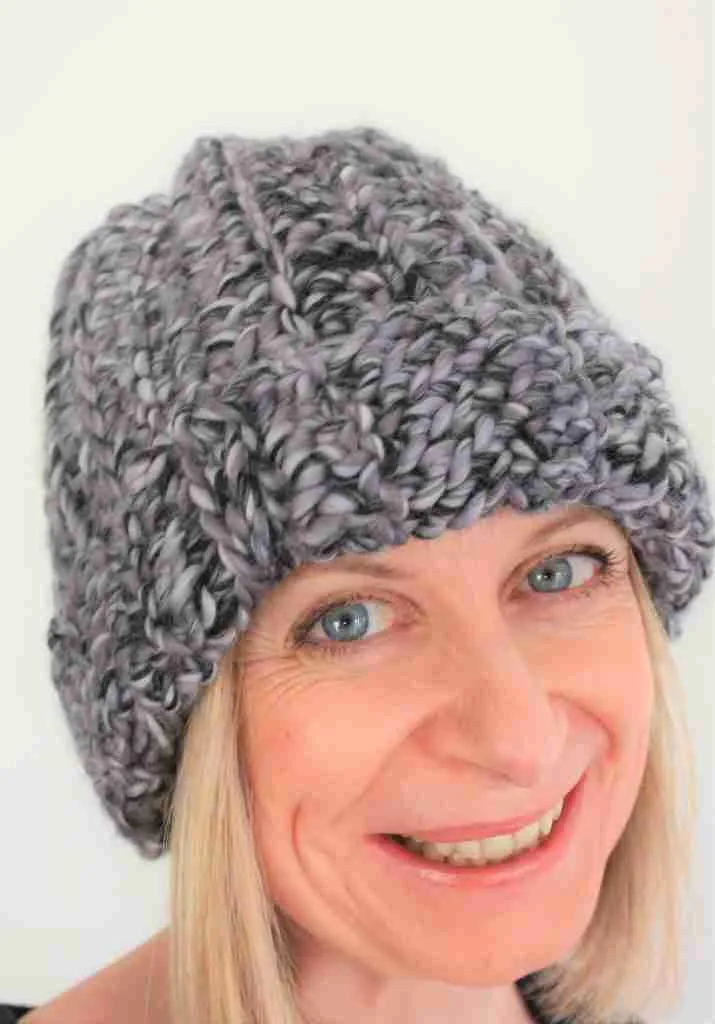
What Do I Need To Crochet My Super Chunky Crochet Hat?
To create your beanie you will need:
- Super Bulky Weight Yarn (size 6) – Approx 200g (135m). I used 2 strands of King&Eye pure merino held together click here to shop
- US size P Hook (12mm) Click here to see my favourite on Amazon or Click here to see it on LoveCrafts.com
- Scissors and Tapestry needle
(Some of my posts contain affiliate links. If you buy something through one of these links it won’t cost you a penny more but I may get a small commission. For example as an Amazon Associate, I earn from qualifying purchases that you make if you click one of my links)
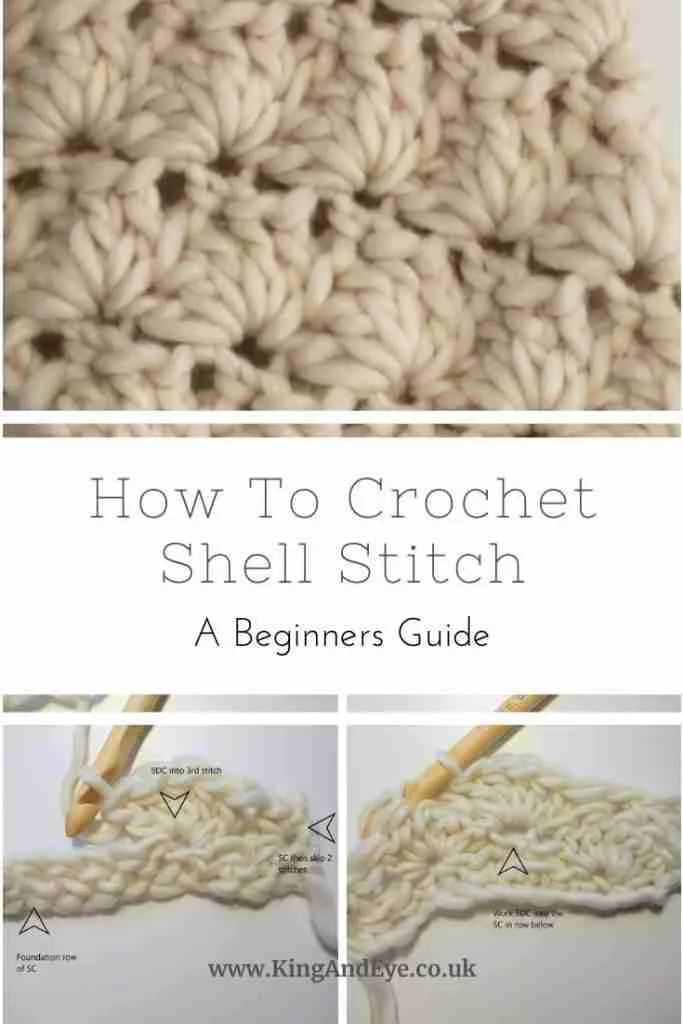
Which Crochet Stitches Do I Need To Make My Super Chunky Crochet Hat?
This pattern is a great way to practice your basic stitches, you should be able to:
ch (chain)
DC (Double crochet)
sl st (slip stitch)
SC (single crochet)
SCBLO (single crochet back loop only). Don’t worry if this sounds confusing I’ll explain how to create this stitch when we get there!
Some notes to remember:
- Stitches are given in US terms
- All measurements given are unblocked.
- Note that measurements are given as exact as possible. Your tension & technique might give variations in the result, but that’s what makes it unique!
- CH3 at beginning of row counts as a stitch
- The pattern is worked from the top down in rounds and is joined with a slip stitch (sl st).
- Do not turn when you work the next row.
- Mark the first stitch of each round with a removable stitch marker. Move the stitch marker up as each round is completed.
How To Start Crocheting Your Hat In The Round
Rnd 1: Make an adjustable magic loop.
How To Create A Magic Loop in Crochet
To make an adjustable magic loop, holding the tail end of the yarn under your thumb wrap the yarn twice around the fingers of your left hand to create an ‘x’ shape – the working end of the yarn will be behind your fingers.
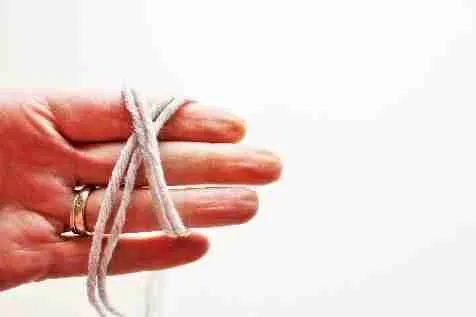

Turn your hand so the palm is facing the floor, insert the hook under the first line of yarn and hook the working yarn (nearer your knuckles), pull this yarn under the first row of yarn so you have a stitch attached to a large loop and a tail.
Your magic loop should look something like this:

Ch 3, so now you have the loop with tail ends hanging down and the chain attached to your hook, this chain is your first stitch.
Work 11 DC by yarning over then inserting the hook into the centre of the loop through all four strands of the loop as though it is a stitch (two strands of loop plus the loose ends), yarn over then pull up a loop.Yarn over again and pull through 2 loops, Yarn over and pull through both remaining loops.
Once you have completed your 11 stitches pull the loose ends of yarn and the loop will tighten – great isn’t it? That’s why it’s known as a magic loop!
Sl st into original chain. (12 stitches)
Now we’re going to create the rest of your beanie:
Rnd 2: Ch3, work 2 DC into each remaining stitch. Join to top of chain 3 with slst. (25 stitches) Don’t forget to mark your first stitch with a marker and move it up at each row.
Rnd 3: Ch 3, DC into same st, DC into next 2 stitches.
2DC into next st, *DC into following 3 st, 2DC into next stitch* around.
Finish with 2DC in last stitch. Join to Ch 3 with slst. (31 stitches)
Rnd 4-6: Ch 3, DC into next stitch, DC each st around (31 stitches), join with sl st.
Almost there already! Now we will create the brim:
Rnd 7-8: Work in back loops only. To find the back loops turn your work so you are looking at it from the top, you will see each stitch has a V shape. The leg of the V which is furthest away from you is the back loop.
Ch1, SC into the same st, then SC into the back loop of each stitch all the way around.
Repeat this for Round 8.
Slst to finish. (31 stitches)
Tie off. Weave in your ends. Turn the hat inside out and watch the magic happen!
How To Create Your Pom Pom
Make a 4 inch (or bigger if you want drama!) pom pom.
Wrap a long length of yarn (around 1-1,5m) around the centre of a piece of cardboard that is 4 inches square about 80-100 times. Slide the looped yarn off the cardboard.
Cut a length of yarn, about 8 inches, then tie this yarn length around the centre of the looped yarn bundle to form a figure of 8 shape, secure with a knot. Cut the looped yarn open at each end and trim. Do not trim the ties!

How To Fix Your Pom Pom To Your Hat
Attach the pompom to the top of the beanie using the long ties and a tapestry needle.
I usually thread one tie through the needle then feed it through just to the right of the centre hole, then repeat with the second tie on the left side. Tie the two ends together on the inside of the beanie and secure with a knot. Weave in your ends and make sure it is very secure.
Now it’s time to get your phone out! I love to see your finished projects, make sure you tag me on instagram (@kingandeye) for a chance to be featured
More Free Crochet Hat Patterns

was very instructions. will surely give it a try