
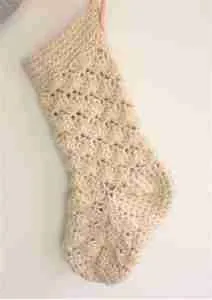
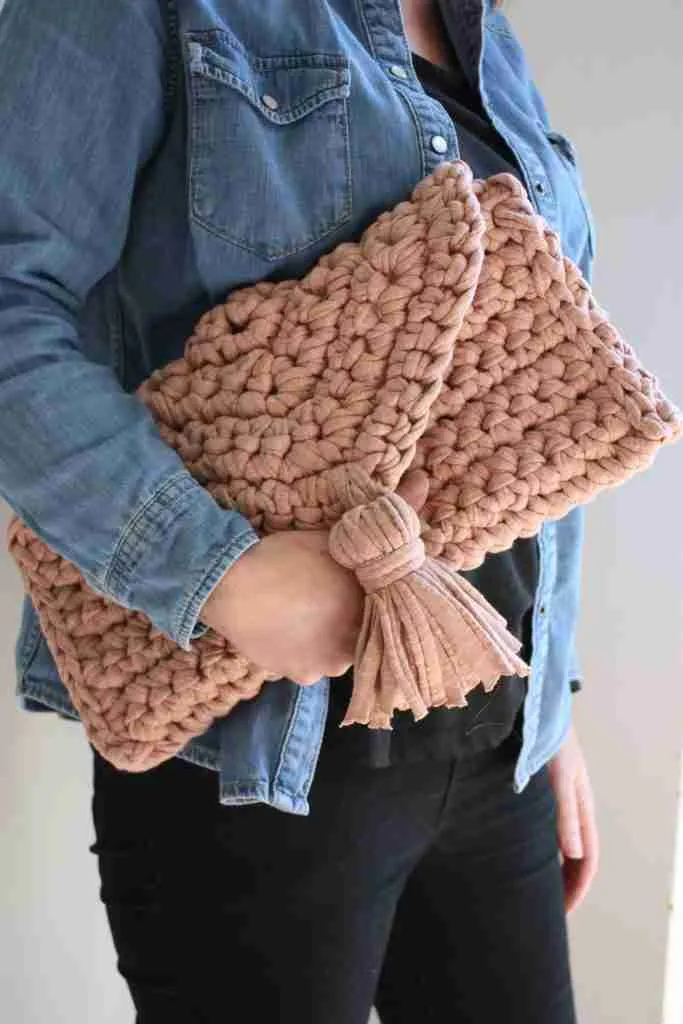
I know you love quick and easy projects and YOU know I love projects with chunky yarn…..put the two together and what do you get? This quick and easy giant christmas stocking!
Which of course is made in my favourite size 6 super bulky yarn which not only means it’s a giant size for stuffing with loads of goodies, but it’s also easy to create when you’re a little short of time.
If you’ve been wondering about crocheting a stocking this year then I got you. If you can double crochet you’re on to a winner.
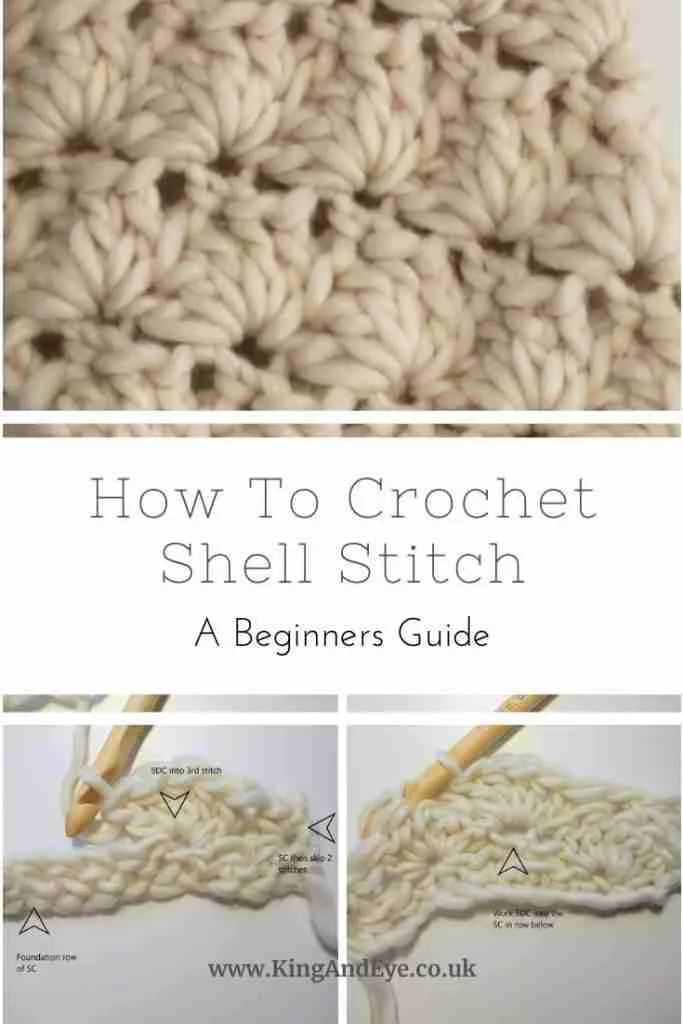
The body of the stocking is created from a shell stitch to add some rustic decoration which is perfect for the farmhouse look, create it in minimal neutral shades as I did and it has a more modern Scandinavian feel.
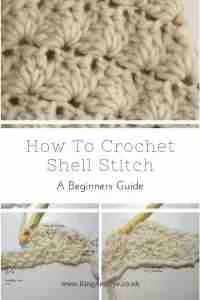
If this looks a bit complicated, don’t worry I’ve got your back. I have a shell stitch tutorial here for you too!
If you’ve been looking for free stocking crochet patterns then check out my pinterest boards or Pin it for later here
(Some of my posts contain affiliate links. If you buy something through one of these links it won’t cost you a penny more but I get a small commission. For example as an Amazon Associate, I earn from qualifying purchases that you make if you click one of my links)
This pattern is part of the 24 Days of Quickies with MarlyBird and is FREE to download on 21st December

If you’ve missed any of the previous patterns you can click here to see which ones you might want to download after you’ve made your giant stocking.
What Materials Do I Need To Crochet My Giant Christmas Stocking?
Super Bulky Yarn (size 6) approximately 250g (150m)
(I used King&Eye pure merino in ivory because let’s face it all of the reviews say it’s the best luxury yarn out there!)
10mm hook (US size N)
(Check out my favourites in my Amazon Shop)
What Size Is The Giant Crochet Christmas Stocking?
The finished stocking is approximately 20 inches (50cm) long by 8 inches wide (20cm)
Do I Need a Gauge Swatch?
I have added a gauge measurement (a 10x10cm square that you work up to test your stitch size) for you to check that your stocking will be a similar size to the measurements above.
In this pattern gauge is not important, which means that if your 10x10cm swatch is bigger or smaller that doesn’t really matter, but it may mean that you use more (or less) yarn.
I know it’s a step we ALL want to ignore but checking your gauge is a really important habit to get into, as once you progress to more complicated projects it plays an important role in making sure your project is the right size.
Trust me when I say you DON’T want to spend hours creating something beautiful that will only fit your six year old next door neighbour!
Gauge (10cmx10cm): 2 shells stitches x 3 rows

Which Stitches Do I Need To Crochet a Christmas Stocking?
Stitches Used (US American terms):
Chain (Ch)
Slip Stitch (Slst)
Single Crochet (SC)
Double crochet (DC)
Single Crochet 2 together (SC2tog)
Single Crochet Back Loop Only (SCBLO)
See my tutorial on crochet shell stitch if you’re not sure.
This is a really handy chart to help you decipher stitches.
Just a note: some patterns refer to the stitches in UK or US terms – although the stitches use the same techniques they are (rather confusingly) named differently.
For example, a chain stitch & a slip stitch is the same in both terms but a single crochet in US terms is known as a double crochet in UK terms!! ALWAYS check to see if your pattern uses UK or US terms to avoid getting frustrated and more importantly a project that just looks nothing like you had planned!!
Did you know you can get the PDF for FREE on 21st December?
Click the image to take you to Ravelry to grab your download.
Don’t forget to check out the blog at Marly Bird to see which other FREE patterns you can download.
How To Crochet Your Giant Chunky Christmas Stocking
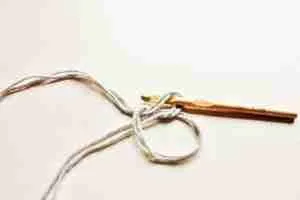
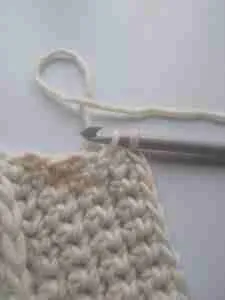
The best way to start crocheting a stocking is by creating a magic circle.
To make an adjustable magic circle, hold the end of the yarn under your thumb wrap the yarn twice around the fingers of your left hand to create an ‘x’ shape – the working end of the yarn will be behind your fingers.

Turn your hand so the palm is facing the floor, insert the hook under the first line of yarn and hook the working yarn (nearer your knuckles), pull this yarn under the first row of yarn so you have a stitch attached to a large loop and a tail.

Your magic circle should look something like this:
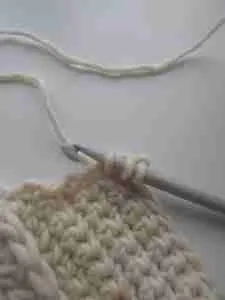
Ch 2, so now you have the circle with tail ends hanging down and the working yarn and chain attached to your hook, this chain is your first stitch.
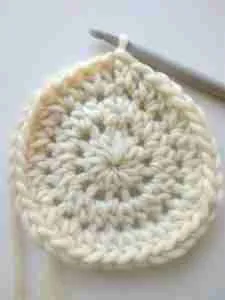
Row 1 Work 11 HDC by YO then inserting the hook into the centre of the circle under all four strands of the circle as though it is a stitch (two strands of circle plus the loose ends). YO then pull up a loop back through the centre of the circle, YO then pull through all 3 loops on the hook, securing the yarn around all four strands of the magic circle.
Once you have all 11 HDC pull the loose ends of yarn and the loop will tighten – great isn’t it?
That’s why it’s known as a magic circle!
You should now have 12 stitches in your circle, slst to the top of the chain.
Row 2 Chain 2, 2HDC into each stitch, slst to top of the chain (24)
Row 3 Chain 2, *2HDC into the first stitch, 1HDC into the second stitch*. Continue from * to* around. Sl st to top of chain (36)
The toe is now complete.
Row 4 This is the start of our shell pattern, which is worked in groups of 6 stitches.
Ch1, SC into same stitch, skip 2 stitches then work 5 DC into the 4th stitch (this creates your first shell), skip the next two stitches, the first set of 6 stitches is now complete.
Anchor the shell with a SC to start your second set of 6 stitches – *skip 2, 5DC, sk2, SC*. Continue around from * to * until you have 6 sets of shells. Slst to the first stitch. (36)
Row 5 Ch3, work 2DC into the same stitch (this creates half a shell, which sits on top of a SC below, we will create the other half when we’ve worked our way around).
*Sk2, anchor with a SC on top (middle stitch) of the shell below, sk2 then 5DC into the SC below*. Continue from * to * until you return to your chain3 and 2DC in one stitch, we can complete this shell with 2 more DC in the stitch now to give us a total of a chain 3 plus 4DC.
Sl st the DC to the top of the chain to complete your shell.
Repeat Row 4&5 two more times each until you have 6 rows of shells.
How To Turn The Heel On Your Crochet Christmas Stocking
Mark your starting point with a place marker,
Ch1 then work one SC into each of the next 18 stitches, ch1 and turn
SC into 17 stitches, ch1 and turn
SC into 16 stitches, ch1 and turn
SC into 15 stitches, ch1 and turn
SC into 14 stitches, ch1 and turn
SC into 13 stitches, ch1 and turn
SC into 12 stitches, ch1 and turn
Now for the fun part, we are going to ‘turn the heel’to create a 3d effect!
Work 1SC into each of the 12 SC in the row below.
When you reach the end of the row insert the hook between the posts of the last two stitches in the row BELOW the one you are working and draw up a loop.
Insert the hook between the last two stitches in the row below this (ie 2 rows below where you’re working) and draw up a second loop.
You should now have three loops on the hook. Yarn over and draw through all 3 loops. This will create an additional stitch that curves around the edge of your row.
Insert the hook into the row below again (ie 3 rows below where you are working) and create a slst.
You should now have 13 stitches. Turn your work.
Skip the slst and work 1SC into each of the remaining single crochet stitches back towards your place marker.
At the end of the row insert your hook between the last 2 stitch posts in the row below and pull up a loop as before. Insert your hook between the last 2 stitch posts of the second row below where you are working and pull up your second loop. Yarn over then pull through all 3 loops to create your extra stitch.
Then work a slst between the last 2 stitches of the third row below and turn (14)
Continue with this method of skipping the slst, 1 SC into each SC of the row then pulling up a loop between the last 2 stitches of the row below & again in the row below that, YO and pull through 3 loops, plus a slst between the posts of the last stitches in the row three below until you have 18 SC.
This will ensure you have the same number of stitches as you started with (36).
Anchor to the top of the shell with a SC.
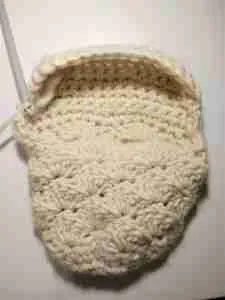
Congratulations!!
The tricky part is done and now you can continue with your shell pattern to create the main part of the stocking.
Your SC should have been stitched onto the top of a shell so now it is easy to sk2, 5DC, sk2, SC as before. I found it easier to continue this pattern and work in the round so I didn’t end up with a seam at the side of the stocking as I would have done if I had repeated the two row work we did for the foot.
Continue working in the round (sk2, 5DC, sk2, SC) until you have 12 rows (or longer if you prefer a really giant stocking).
Stop when your hook is in line with the middle of the heel. Anchor with a SC.
Create The Decorative Ribbing For Your Christmas Stocking
Now you have a choice for your stocking top, you can either use SC to match the toe and the heel or you can create a more decorative look as I have.
In either case, ch1.
To create my horizontal ribbed look, SC into the back loop only (SCBLO) of each stitch around the stocking, you can continue to work in the round again to avoid an obvious seam and stop when you are happy with the depth of the ribbing. I worked 6 rows.
Stop when you are in line with the heel and slst to anchor your work.
Weave in your ends.

To hang your stocking you can add a leather strap as I did, alternatively decorative ribbon looks lovely or you can crochet a strap by creating a foundation chain and SC for 2 or 3 rows.
Now go take a photo and tag me on Instagram (@kingandeye) I’m so excited to see what you’ve made!
More Christmas Gift Ideas To Crochet
Click the images to see more Christmas crochet ideas


Help, I got the first part of the heel done but do not understand how to do the next step when you say to turn the heel. I am a relatively intermediate to even advanced crocheted but can’t wrap my head around where to go next. Help because I love this stocking so much.
Hi Anne Marie, hopefully you have the email I sent you with a video link to explain it. Claire
I am having trouble with the same part! Could you send me that video link too? I’d really appreciate it. I love this pattern!
This is the tricky bit, once you’ve got it you’ll be flying with the rest. Unfortunately I didn’t think to film it at the time as I’m only just getting going with youtube, which is a big regret! But I’ve attached a video that might help you to visualise where to join the two sections to create the curve in the heel. If you scroll to 2mins 50 secs it is at about the same stage.
https://youtu.be/hRE-qWHOyZs
Basically you want to join the row of 12SC that you have just completed to the side edge of the block of SC below, so at the end of each row you will work SC2tog then join to the side of the row below with a slst – I’m so sorry I don’t have pictures. I really think I’ll have to make another one and film it this time!!