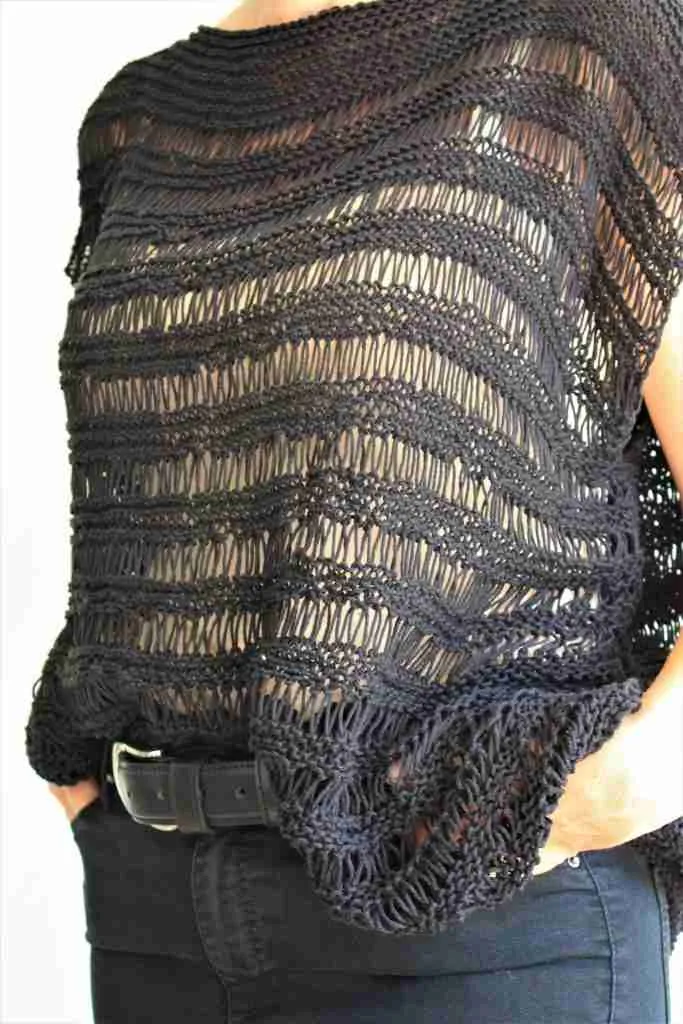
Do you worry that dropping stitches in your knitting will ruin your project? Well I’m here to tell you you don’t need to because today my friend I’m going to teach you how to drop a stitch in knitting intentionally to create a beautiful open and airy texture for your creations, especially when you want to create loose, drapey summer fabrics. I’ll admit the knit drop stitch does look really scary when you lose those stitches but it is so worth it for the gorgeous texture we’re going to create together!
I have a wonderful summer pattern coming to a blog post near you very soon, so let’s get on with practicing and perfecting how to knit a drop stitch so you’re ready when the pattern drops.
Why Use Knit Drop Stitch?
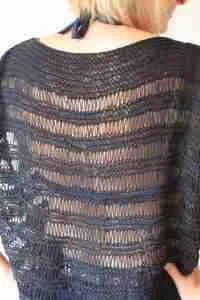
Elongated Knit drop stitch gives a light, open, airy and elegant knitting stitch.
It’s a great introduction to lace knitting.
Elongated knot drop stitch is such an easy stitch to create simply by wrapping and slipping yarn from your working needle and an extra bonus is that it works up really quickly. If you’re new to knitting you may want to check out some of my tutorials and handy resources on the knitting knowledge page.
Use a light DK cotton in summer tops and beach cover ups or create a beautiful chunky scarf for the colder months. There are so many variations to the stitch depending on how many wraps you use and which yarn you decide to grab from your stash, you’ll never get bored of watching those loops magically appear!
Which Yarns Are Best For Summer Knitting?
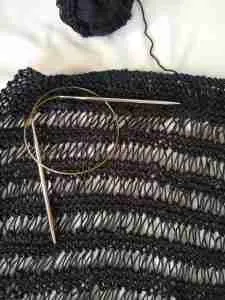
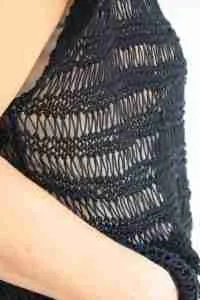
The knit drop stitch is perfect for summer patterns as it is loose and airy (although it works just as well in chunky projects and in homewares too). The project I’m working on at the moment is a summer top which has rows of elongated knit drop stitch to create a great beach cover up. This is the project we’re working through today.
Summer knitting can be a great way to relax during the holidays but hot, sweaty hands are never a good thing and who wants to lug a great big bulky project to the beach anyway? This is where lighter cotton yarns come in, they’re usually created in finer weaves which give great stitch definition. Mixes with linen, silk or bamboo give an even greater drape and are super soft and cool against the skin.
Today I’m working with paintbox DK cotton in black, which shows off my stitches really well. I just find that working with the cotton gives a little bit of slip and that gives a nice structure to the to the drop stitch and allows it to move nicely.
How To Knit A Drop Stitch Step By Step
The knit drop stitch is worked over 3 rows, first we will create a couple of set up rows, then we will do the exciting part and drop our stitches!
It doesn’t really matter how many stitches you work on for this sample.
For my swatch I’ve put 20 stitches on the needle.
We need to work a few rows of a more stable stitch at the base of our project to help stop the elongated stitches from spreading out too far at the bottom. If we didn’t do this the bottom of the stitches would catch and look more like loose uncontrolled loops, which is not the look we’re going for today!
How To Knit Drop Stitch Step By Step Instructions
Row 1: Knit all stitches.
Row 2: We knit our first stitch as we usually would, then instead of moving on to our second stitch we’re going to do a yarn over (you may see this abbreviated as YO in some patterns).
Now don’t be scared of this, I’ve been terrified of doing this for ages and it’s actually really easy!
So we take our yarn and bring it to the front of our work as if to purl. Wrap the yarn up and over your right needle in an anti clockwise direction so it is now behind your work, that is one yarn over – you’ve done it already!
Now repeat this yarn over a second time by bringing your yarn in front of your work, wrapping it up and over your right needle and now you have two yarn overs.
Knit the second stitch on your left needle as usual to secure your yarn overs, then work 2 more yarn overs.
It may look as though you have created lots of extra stitches but don’t worry, if you look closely you will see that only the first stitch and the stitch you have just completed are actually attached to the row below. When we drop the yarn overs in the next row you will still have the original number of stitches.
Continue working Knit 1, 2YO until you have one stitch left on your needle. Knit this stitch to secure your row.
You will have an awful lot of loops on your right needle. We’re not going to knit them all, otherwise we’ll end up with three times as many stitches, so this is where the fun begins and we’re going to drop those extra yarn overs.
Row 3: Knit the first stitch to secure our row. Now you come to our two yarn overs, you should be able to see that’s where we’ve wrapped it around the needle.
All we have to do with these yarn overs is simply slide those off the needle and then we go back in and we knit the next stitch that we had knitted in the previous row and then we take our two yarn overs and we drop those off.
Continue working K1, drop 2 yarn overs until you have one stitch left. Knit this stitch.
In Summary: How To Knit Drop Stitch
- Cast on any number of stitches plus 2
- Row 1: knit all stitches
- Row 2: K1, YO2, knit last stitch
- Row 3: K1, drop 2, knit last stitch
- Dance around the room because you’ve just mastered your first lace knitting project
Tips For Knitting Drop Stitch or Elongated Knit Stitch
When you first start to drop your yarn overs it can start to feel a bit messy as you have some looser loops under your right needle but lots of tight wraps still on your left needle. Don’t worry you will catch up when you get to the end.
I know it’s REALLY tempting to tug at those loose loops on your right needle because if you’re anything like me you’re impatient to see the gorgeous zig zag texture that you’ve just created, but please please please wait until you reach the end of the row! This is because you may end up with uneven stitch sizes and if you pull too tightly then the stitches and YO on the left needle may also get pulled tighter making it more difficult to insert your needle.
Remember to check your tension regularly, you really want to make sure your loops are even when you finish your project.
Please don’t think you need to be clever here and insert your needle to slide the yarn overs off, it is an easy way to do it but you don’t have to do it if you start to get a bit confused as to which are your stitches and which are your yarn overs. Personally, I find it can be just as easy to slide them off with your finger, knit the next stitch and then either use your needle or your finger to drop those yarn overs.
How To Knit A Drop Stitch On Youtube
If you’re more of a visual learner you might prefer to watch a quick step by step tutorial of drop stitch knitting on Youtube.
I hope you liked today’s tutorial, let me know how you got on via email at [email protected] or via the social buttons below (you can generally find me @kingandeye.co.uk on most channels).
If you like the post then be sure to check out my patterns at www.kingandeye.shop or the free patterns on the blog

